Home > Manuals > Touch Screens and Control > TS.N Touch Screens > Installing for TS.6N
Installing for TS.6N
| Installation Instructions | ||
| The TS.6N includes the following items for installation: 1 - TS.6N Touch Screen 1 - Plastic Wall Cover w/ Magnetic Mounts 1 - Power to Ethernet Injector Brick 2 - Phillips Head Sheet Metal Screw (#6, 1-1/2" long, for use with flip tabs). | ||
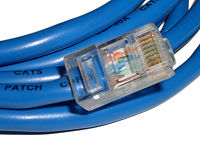
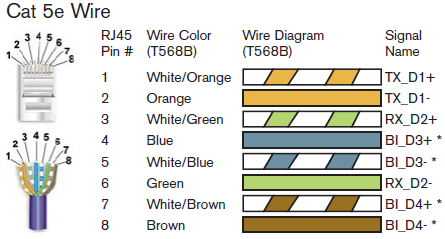 | Each TS.6N uses two CAT 5e cables - one from the switch to the included power injector and one from the power injector to the TS.6N. Please use industry standard Cat
5e cable. If it is necessary to make your own cables, follow the
TIA/EIA-568-B standards. NOTE: The wires marked with a * are very important for the panel to receive power. A cabled wired using the10Base-T standard (only 4 pins used) will NOT work. | |
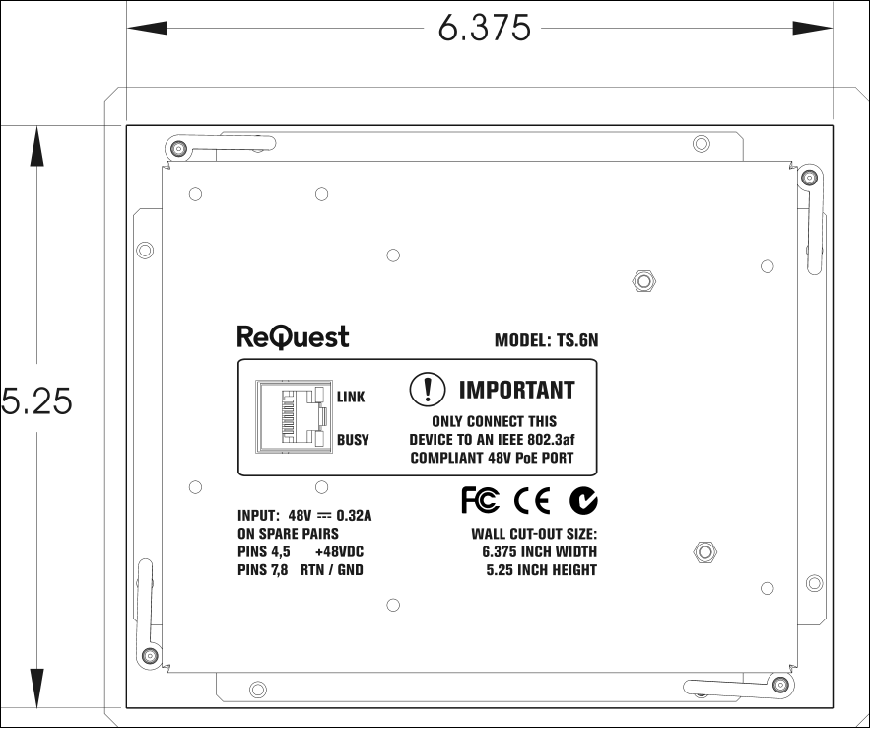 | Cut
out rectangular holes in the wall in preparation for the panels. The
size of the holes must be 6.375" wide x 5.25" high. | |
 | Plug in the power injector brick and run CAT 5e cable from the switch to the brick. Run the remaining cable from the brick and through the wall to plug in through the prepared hole. | |
| | Install
each TS.6N by first plugging in the CAT 5e cable to the back of the
TS.6N. Once you have confirmed the TS.6N powers up and the
GUI displays, align the panel in the wall and tighten 1-1/2" metal
screws screws in the front to engage the flip tabs and anchor the panel
to the wall. | |
| Align front plate with LCD touch screen and attach with built-in magnetic mounts. | ||
See also