Home > Manuals > F3 HD Media Server > Manually Configuring the F3 for DHCP
Manually Configuring the F3 for DHCP
Manually Configuring the F3 for DHCP |
||
Items Needed:
|
||
| Connect the server to a VGA display and plug in the USB Keyboard |
||
| Press Ctrl-Alt-F4 on the Keyboard | ||
 |
||
| Use the Arrow Keys to move between fields. Press ENTER to select an item. Make sure Network Settings is Highlighted and press ENTER. |
||
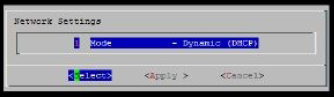 | ||
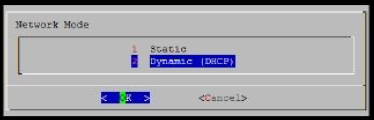
| Press ENTER to be able to select Static or DHCP. Highlight DHCP and press ENTER. |
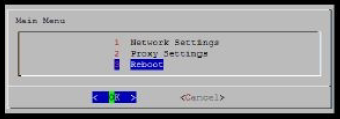
| Choose Reboot when all of your changes are complete to reboot the server and apply the network changes. | ||||
 |
See also